3.6.9 Working with store movements
Article goal
Show how a staff member can work with the “Store movements” page: find required operations, analyze balances, filter data and export reports.
Who this article is for
- Club administrator
- Store manager
- Users with access to the “Store” module
What you will learn
- How to open the “Store movements” section
- How to filter operations by date, category and type
- How to sort data in the table
- How to check balances for each item
- How to export data to PDF and Excel
- Which actions are available on the page
Prerequisites
Before you start, make sure that:
- You have access to the admin panel
- Categories and items are configured in the “Store” module
- Expense / receipt operations are already recorded (for example, sales, inventory, write-off)
Step-by-step guide
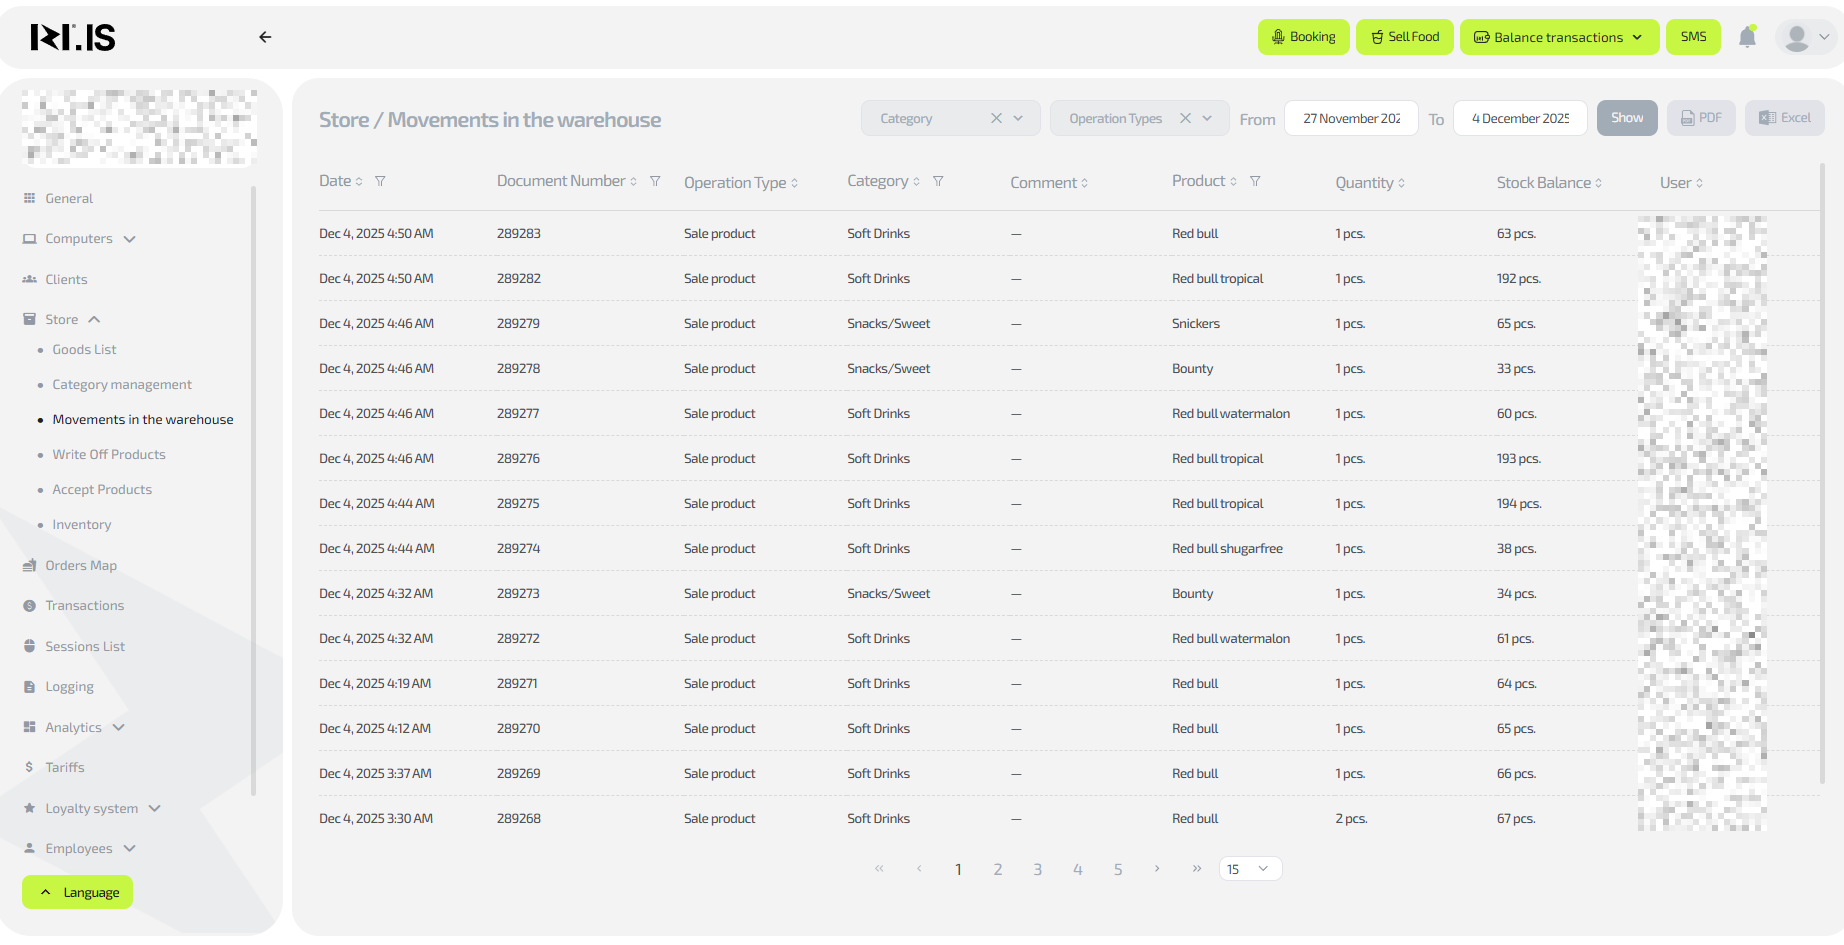
Step 1. Open the “Store movements” section
- Log in to the admin panel.
- In the left menu, open the “Store” section.
- Select the “Store movements” subsection.
A table with all operations — expenses, receipts and stock changes — will appear on the right.
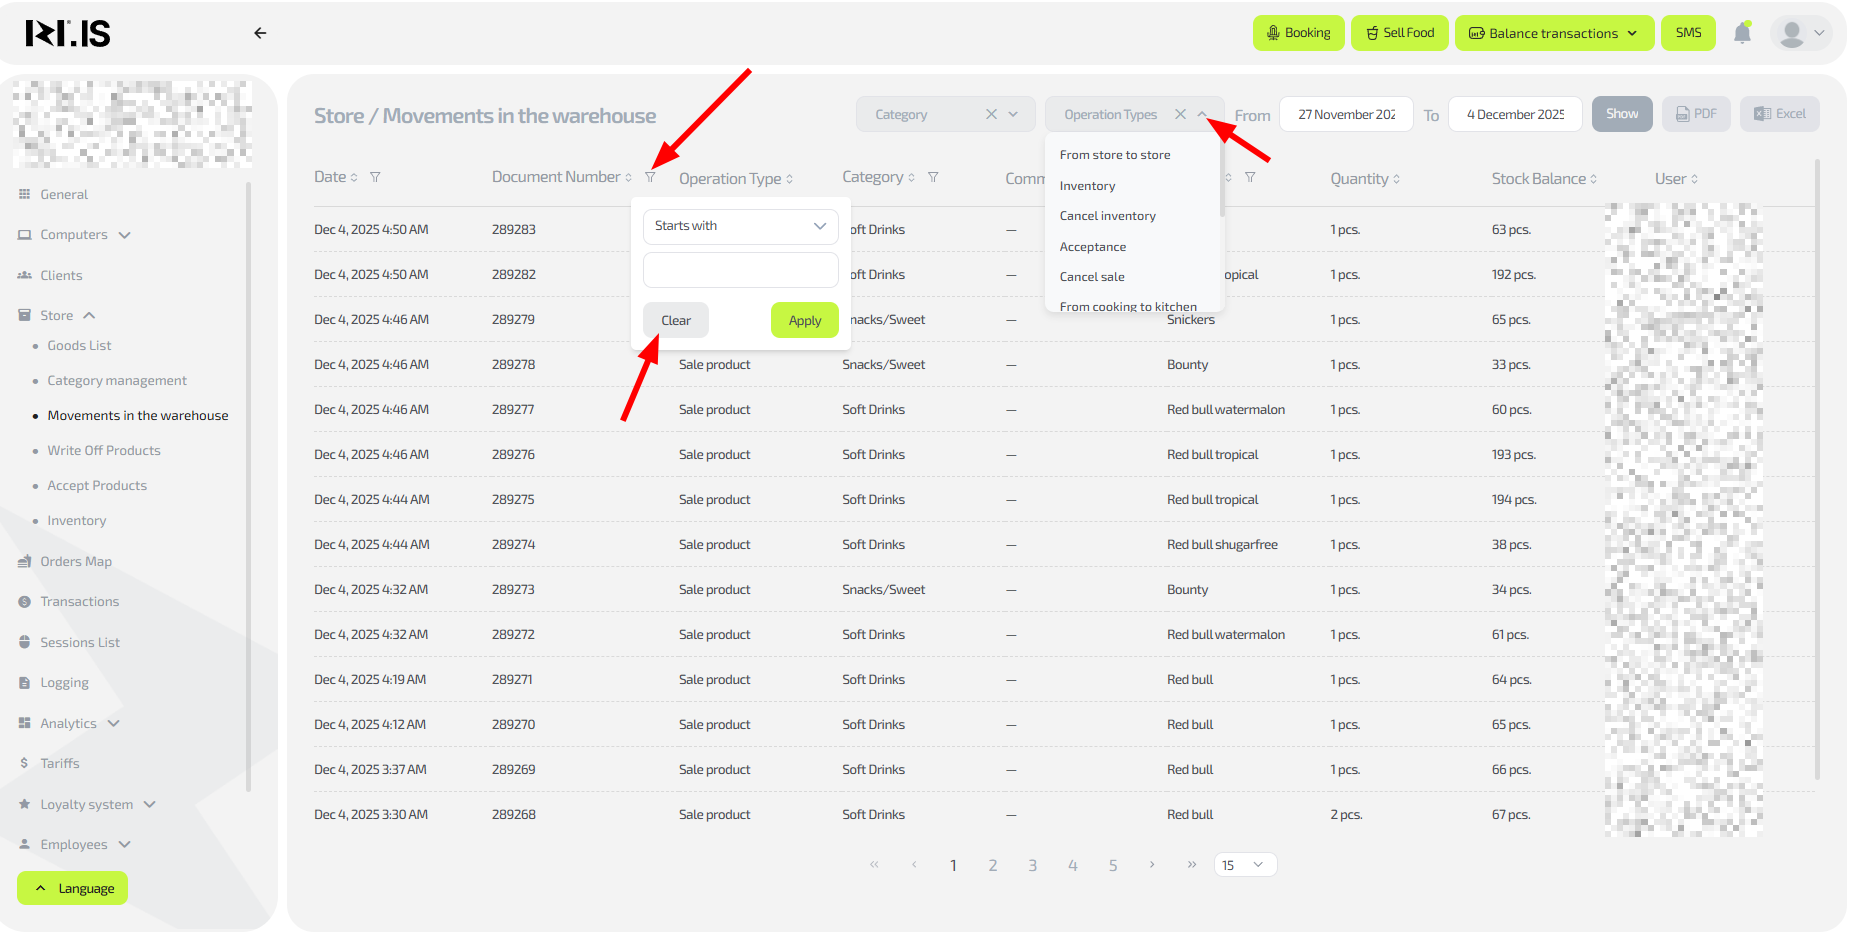
Step 2. Configure filters for convenient search

The top panel contains the following filters:
- Category (for example, drinks, snacks, energy drinks)
- Operation type (expense, receipt, write-off, inventory)
- Date range (“From” and “To”)
To apply a filter:
- Click the required filter (for example, “Category”).
- Select one or more options.
- Specify the date period.
- Click “Show”.
Tip: you can clear an unnecessary filter by clicking the “Clear” button.
Step 3. Work with the movements table
The table contains the following columns:
- Date — date and time of the operation
- Document No. — unique record number
- Operation type — expense / receipt / write-off
- Category — item category
- Comment — administrator note
- Item — item name
- Qty — number of units written off / received
- Stock balance — how much of the item remains after the operation
- User — who performed the action
Each column supports sorting:
hover over the header and click the sort icon.
You can quickly see:
- who performed the operation,
- which item was issued or added,
- how the balance changed after each entry.
Step 4. Export data

If you need to export the movement history:
- Set the required filters.
- Click PDF or Excel on the right side of the panel.
Common situations
| Problem | What to do |
|---|---|
| Operations are not displayed | Check the date filter — you may have selected an empty period. |
| Balances look incorrect | Check the latest operations for this item in the table. |
| Unable to export the report | Refresh the page and try again. |
| Categories are not shown in the filter | Make sure they are created in the “Category management” section. |