3.6.1 Category management
Article goal
Show how to work with the “Category management” section: create and edit product categories, add and edit bar items, manage write-offs and receipts, change categories and the catalog structure.
Who this article is for
- Administrators;
- Bar managers;
- Club owners;
- Staff responsible for stock accounting and working with the store
What you will learn
- Where the “Category management” section is located;
- How to create and edit product categories;
- How to change the order of categories;
- Which actions are available for items inside a category;
- How to edit an item and move it to another category;
- How to write off and receive items;
- How to mark an item as a special offer;
- How to export the item list to PDF and Excel
Prerequisites
Before you start, make sure that:
- You have access to the “Store” section.
- Items and categories are created correctly (if not, you can create them in this section).
- Item and category images are prepared if needed.
Section overview
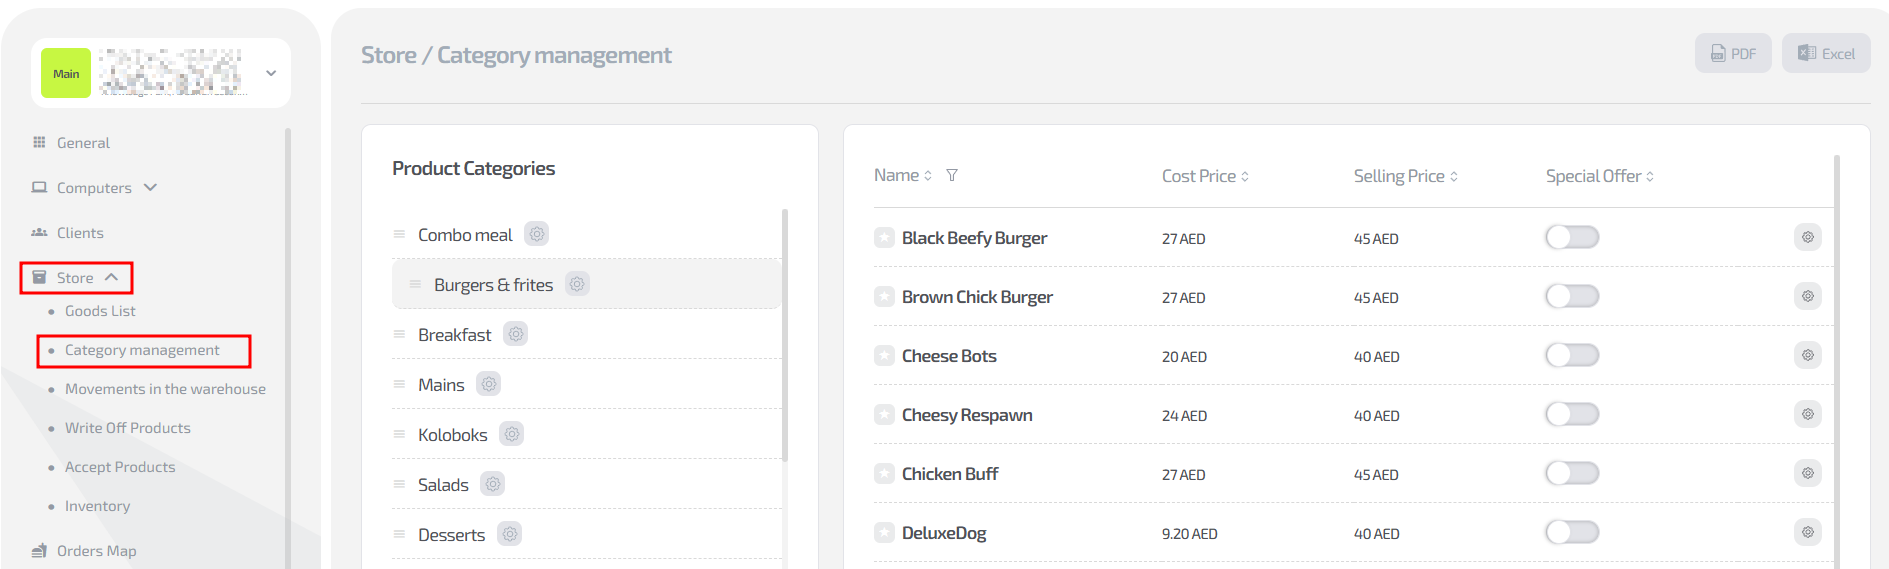
The Store → Category management section consists of two main areas:
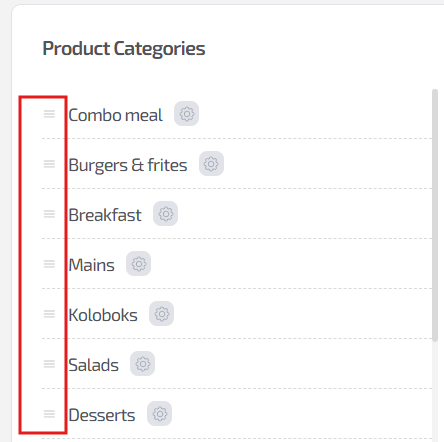
1. Category list (left side of the screen)
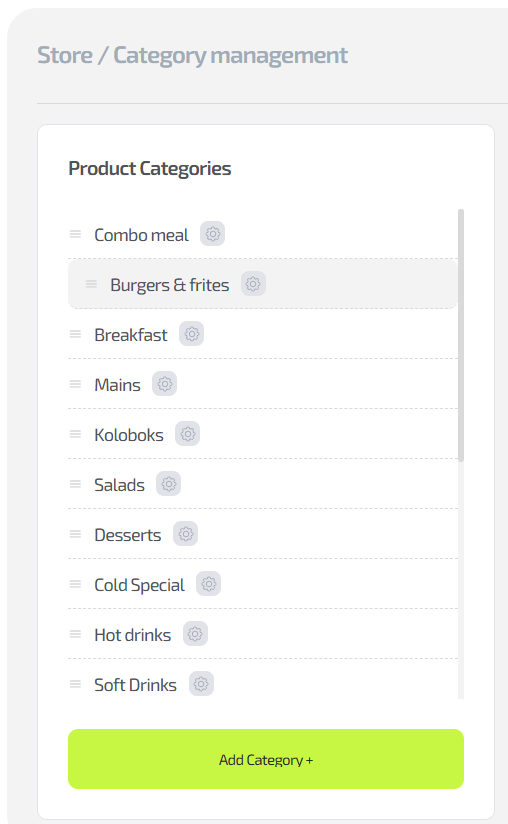
All created bar categories are displayed here. For each category you have:
- Name;
- Category edit button (gear icon);
- Ability to change the order of categories by dragging them using the “three lines” icon.
2. Item list of the selected category (right side)
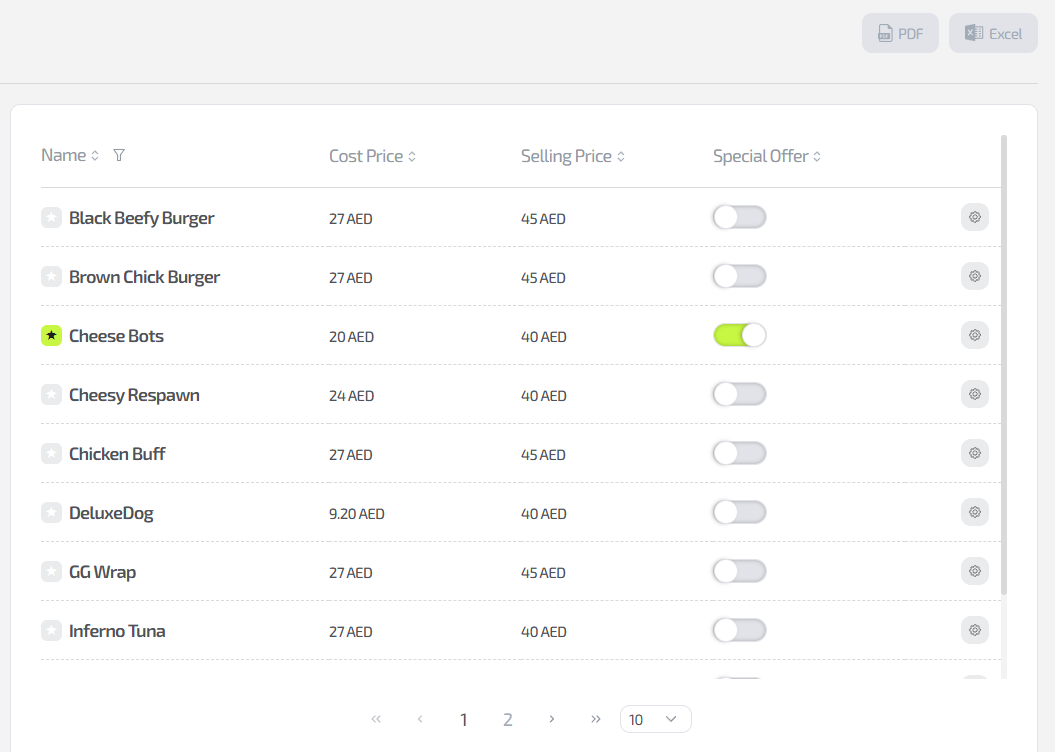
Each row contains:
- Item name;
- Cost price;
- Sale price;
- “Special offer” toggle;
- Action menu (gear icon).
At the top there is a PDF / Excel export button which allows you to generate a report for the category.
Functionality
1. Creating a category
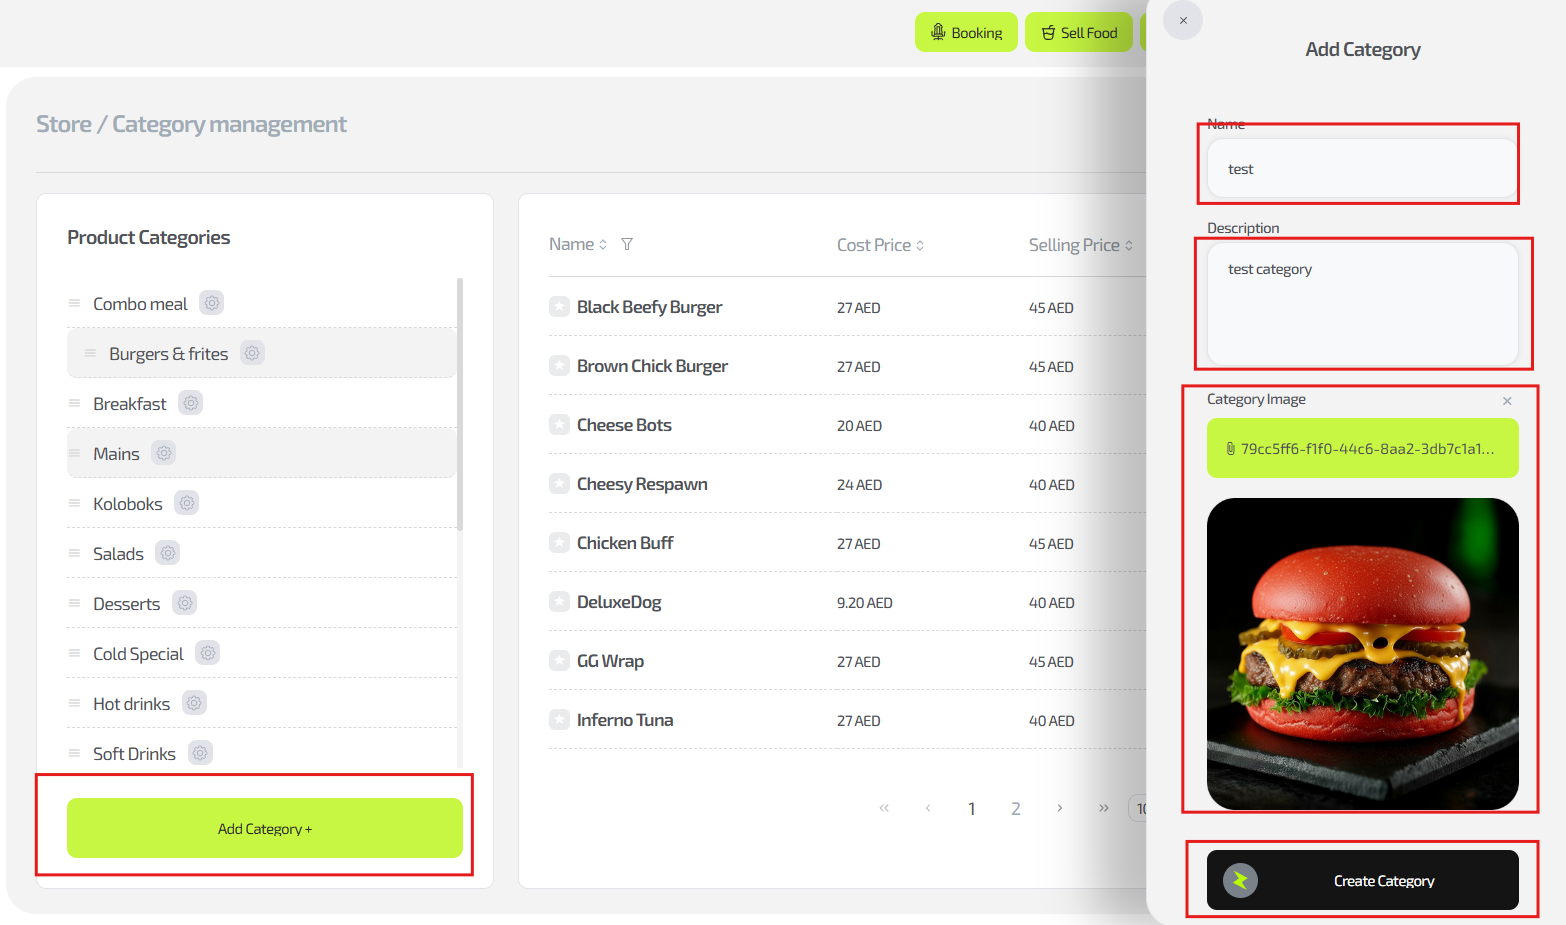
Steps:
- Go to Store → Category management
- Click “Add category”
- In the window that opens, fill in:
- Category name
- Description (optional)
- Category image (displayed in the bar menu in the app)
- Click “Create category”
2. Editing a category
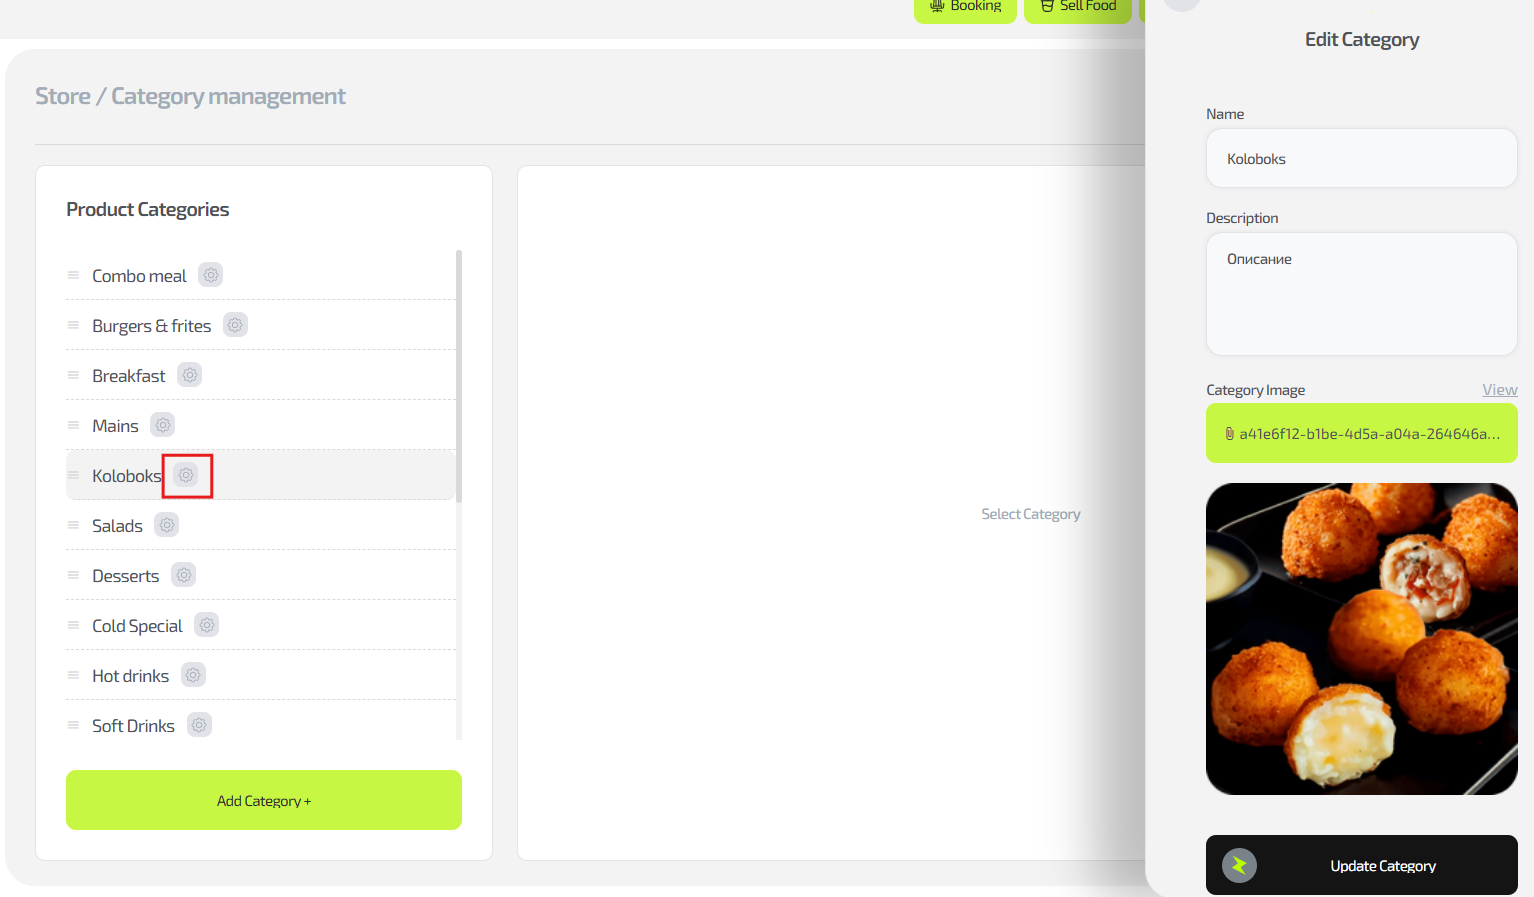
To edit an existing category:
- Select the category in the list on the left.
- Click the gear icon.
- In the window that opens, you can:
- Change the name
- Change the description
- Replace the image
- Click “Update category”
The category will be updated in the general list.
3. Changing the order of categories
You can arrange categories in any order.
- Hover the cursor over a category
- Drag it using the “three lines” handle
- Move it up or down
The order is updated automatically and affects how categories are displayed in the CRM interface.
4. Managing items inside a category

The item menu contains 4 functions:
- Write off item
— manually decrease the item stock (for example, if it is spoiled or used for testing). - Receive item
— add new quantity to the store. - Edit item
— change data in the item card. - Change item category
— move the item to another category.
5. Editing an item

Select a category and then the required item, then click the gear icon on the right side of the row.
When you select “Edit”, a window opens where you can change:
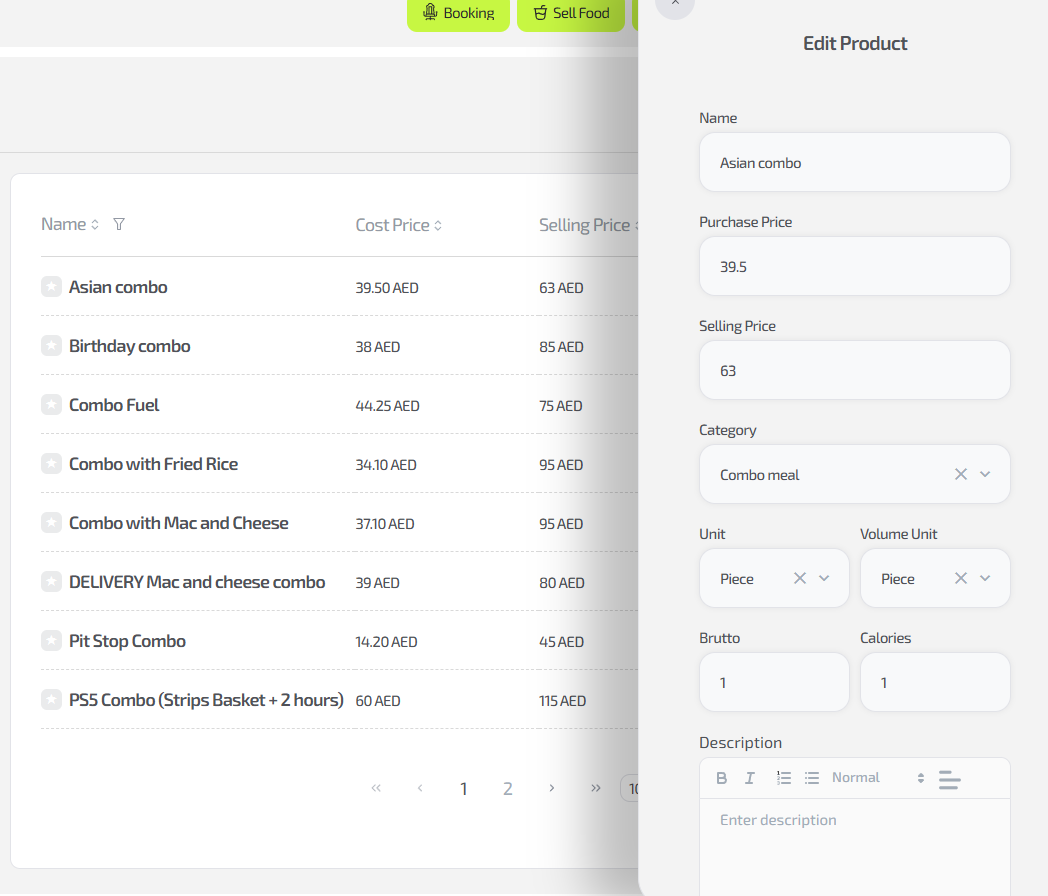
- Name
- Purchase price
- Sale price
- Category
- Unit of measurement (pcs, grams, etc.)
- Volume (ml and so on)
- Gross weight
- Calories
- Item description
- Item image
Important: Without gross weight and calories specified, the item will not be created or updated.
6. Marking an item as a “Special offer”

In the item list there is a “Special offer” toggle.
When enabled, the item is marked as promotional and can be highlighted in the bar interface.
7. Exporting data to PDF and Excel
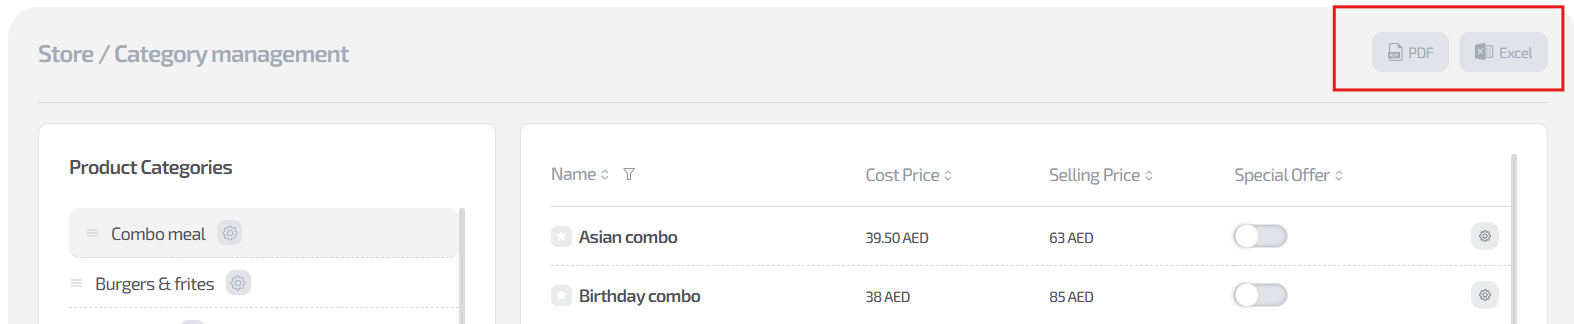
In the upper-right corner of the section there are buttons:
- Excel
They allow you to export the item list of the selected category in a convenient format.
Common situations
| Problem | Solution |
|---|---|
| Item is not saved | Check whether gross weight and calories fields are filled in |
| Image is not uploaded | Use JPG/PNG with size up to 1 MB |
| Category disappeared from the bar menu | Make sure there is at least one active item in it |
| Item is not shown in the bar | Check that the price is set, there are no zero values, and the item is assigned to a category |