3.11.4 Packages. Creating a tariff
Article goal
Show how the club owner can create or edit a package tariff that provides a fixed amount of PC time starting from the purchase moment (with no compensation for unused time).
Who this article is for
- Club owner
- Users with an owner account (the administrator has no rights to create/edit tariffs).
What you will learn
- How to open the package tariff creation window
- How to fill in the parameters on the left and right sides of the window
- How to add periods with different prices (weekdays/weekends, hours)
- Specifics of handling hours and zones
- What to do if the tariff is not saved or time is calculated incorrectly
Prerequisites
Before you start, make sure that:
- You are logged in under the club owner account (the administrator has no rights)
- PC zones are created and active
- Admin panel access is available
Step-by-step guide
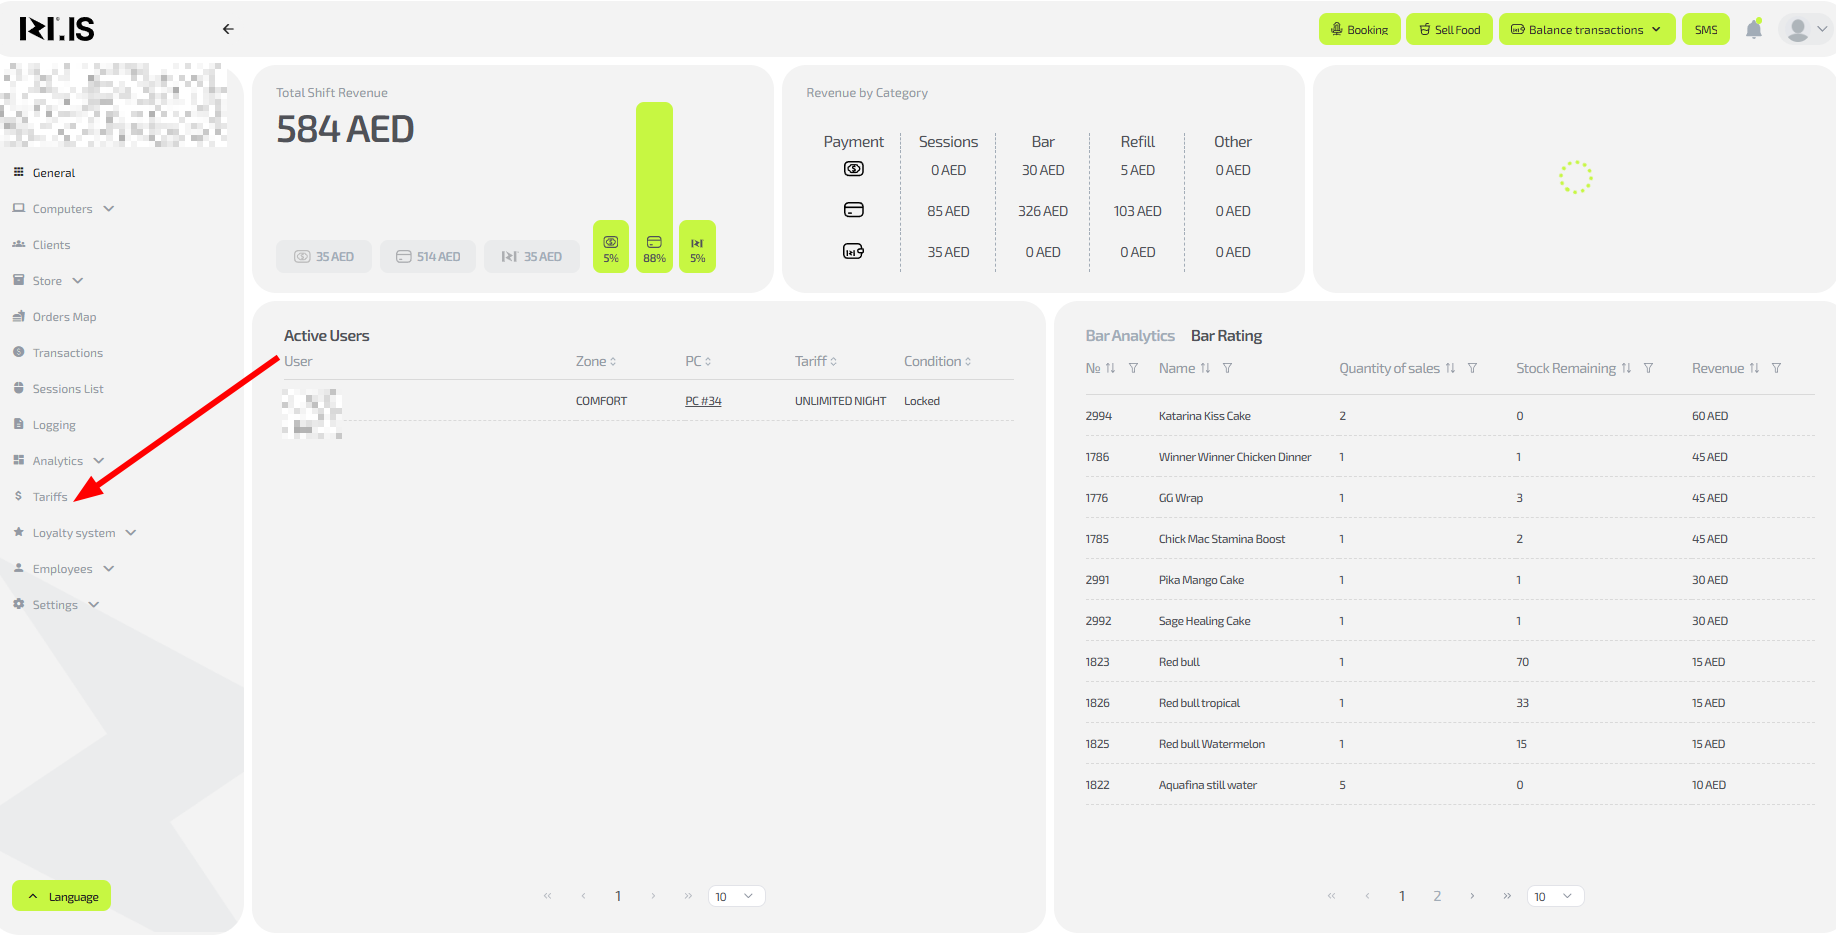
Step 1. Go to the “Tariffs” section
- On the main page, in the left menu click “Tariffs”.
Step 2. Start creating a package tariff
- Click the “+New tariff” button in the top-right corner or “+” in the “Packages” subsection of the required group.
- If you clicked “+” in “Packages”, the type and zone will be filled in automatically.

Step 3. Fill in the left side of the window
- Specify:
- Name of the new tariff
- Type “Package” (set automatically if you came from the subsection)
- Duration in minutes
- PC zone (set automatically according to the group)
- Validity period (optional, used for promotional tariffs)
- Visibility (CRM, app, PC — where the tariff is available for purchase)
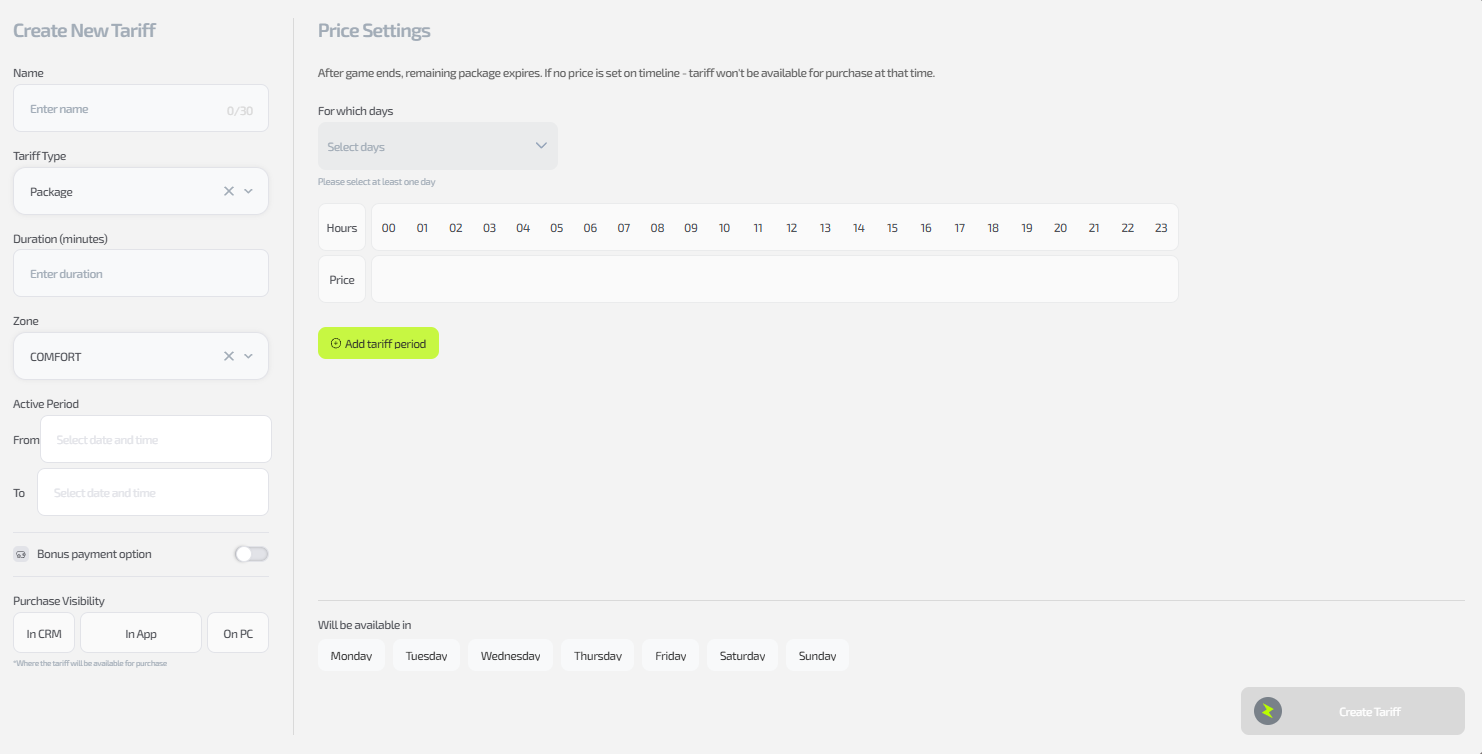
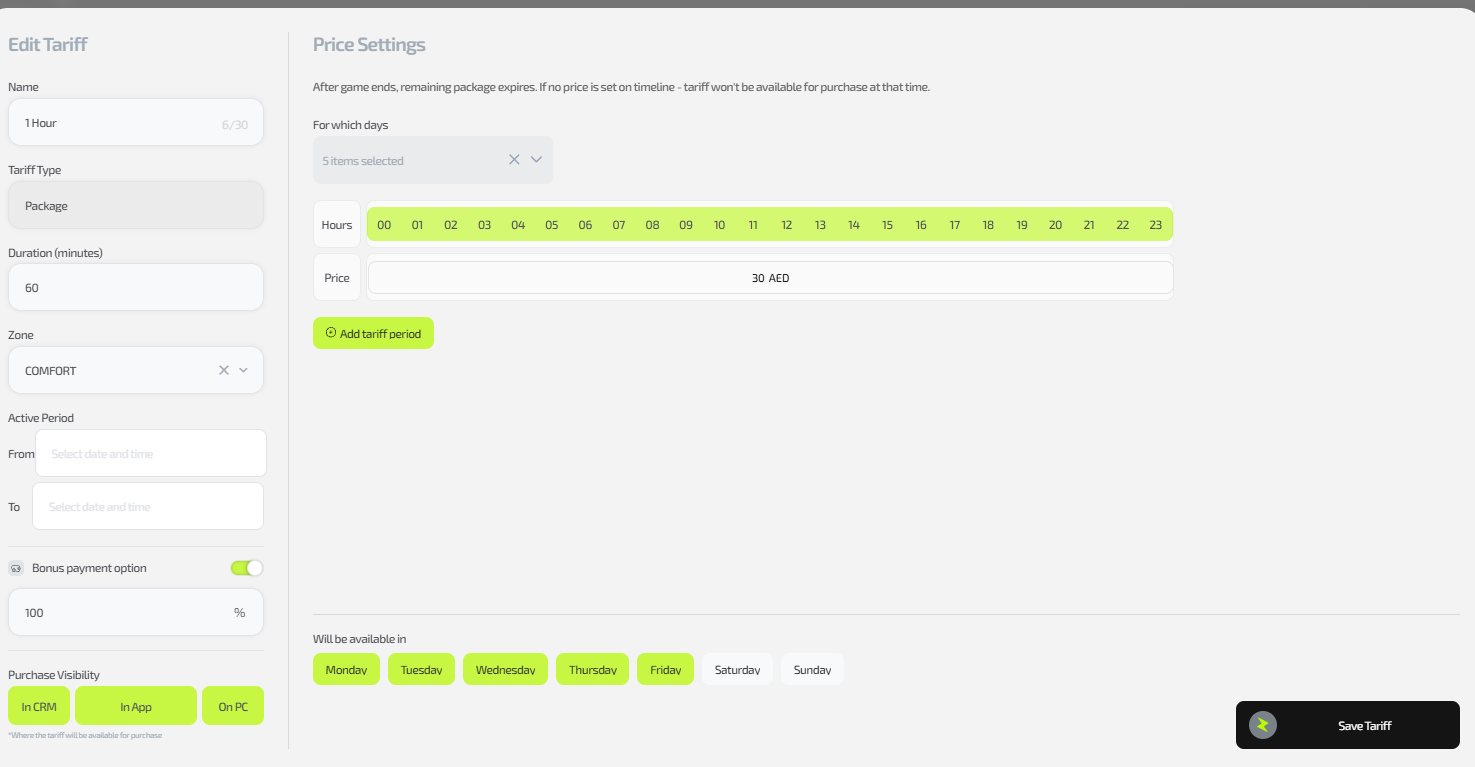
Step 4. Fill in the right side of the window (price period)
- Select the days of the week
- Specify the active hours:
- Click individual hours or drag with the mouse while holding the left button
- Important: set the end time 1 hour lower (for example, 00–08 = 00:00:00–08:59:59)
- Enter the price for the selected period
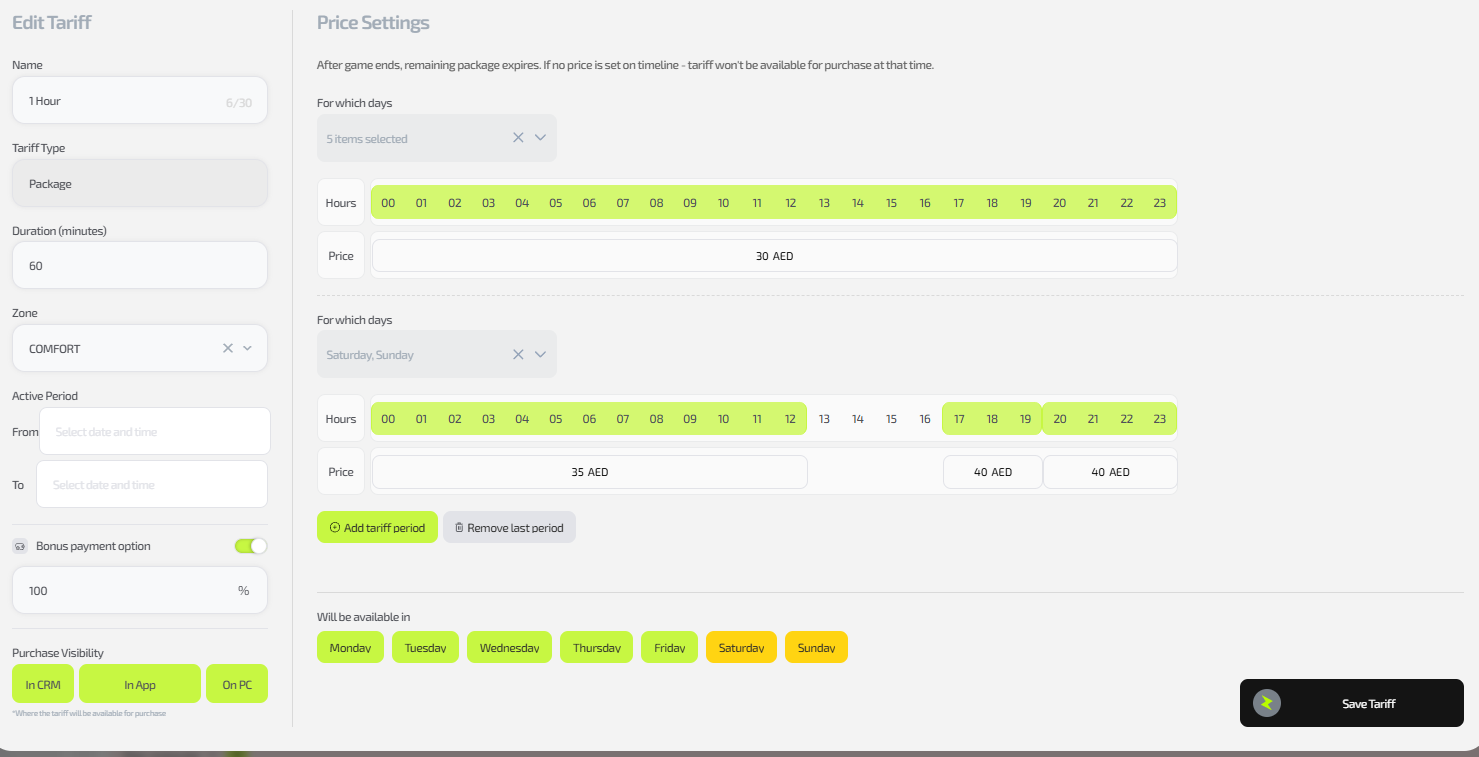
- For split periods (night: 22:00–08:00), set the price in each fragment (00–08 and 22–00)
Step 5. Add additional periods (if needed)
- Click “Add period for tariff”
- Repeat Step 4 for other days/hours (for example, weekends)
Important: The package starts working immediately after purchase; any unused time is lost without compensation.
Step 6. Save the tariff
- Click “Save tariff”
- Test the purchase in the selected channels
Common situations
| Problem | What to do |
|---|---|
| No rights to create | Log in under the owner account; the administrator cannot edit. |
| Hours are calculated incorrectly | Set the end 1 hour lower; check fragments for night tariffs. |
| The tariff is not displayed | Check visibility (CRM/app/PC); refresh the page. |
| Periods are not saved | Make sure the price is set for all fragments; do not duplicate days. |