3.13 Employees. Staff management: how to configure admin panel access for staff
Article goal
Show the club administrator how to add staff members to the system, assign them positions, and configure access rights using roles in order to ensure efficient and secure teamwork.
Who this article is for
- Club administrator
- Business owner
- Manager responsible for staff
What you will learn
- How to add a new staff member to the system
- How to create a position and assign a staff member to it
- How to configure a role — a specific set of access rights (to warehouse, reports, cash desk)
- How to avoid the common mistake with an incorrect phone number
- What to do if a staff member does not appear in the list after registration
Prerequisites
Before you start, make sure that:
- You have owner or senior administrator rights
- You have your staff members’ correct phone numbers at hand
Step-by-step guide
Step 1. Add a staff member to the system
Why this is needed: So that the staff member can log into the system with their own account and get access to their tasks.
- Ask the staff member to register in the IZI mobile app using their phone number.
- Important: The phone number must start with +7 (country code). If they register with a number starting with +8 or just 8, an error will occur and the staff member will not appear in your list.
- After successful registration, the staff member will automatically appear in the general list in the “Employees” section.
Tip: Tell your staff the correct phone number format (+7...) in advance to avoid issues and extra questions.
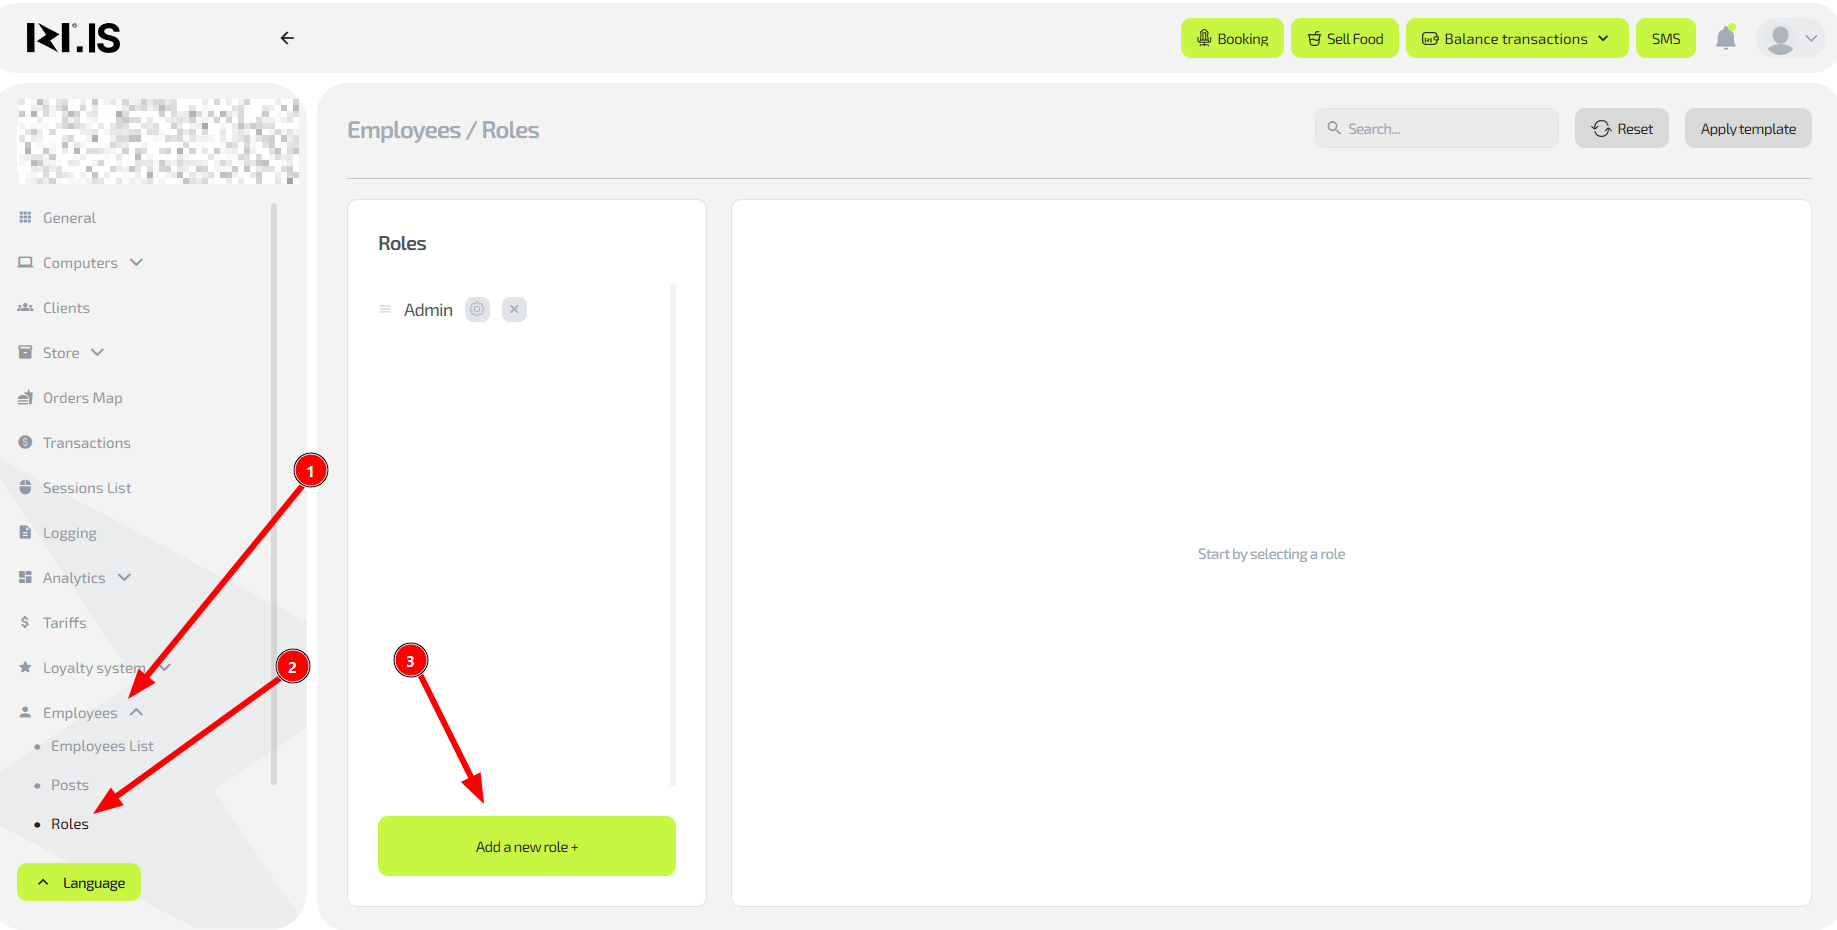
Step 2. Configure an access role
Why this is needed: To control which system sections the staff member can access. For example, a bartender does not need access to financial reports, while a senior administrator needs access to everything. This is your “digital job description”.
- In the “Employees” section go to the “Roles” subsection.
- Click “Add role”.
- Give the role a clear name (for example, “Cash desk access”, “Warehouse management”).
- Tick the sections and actions that this role is allowed to use (for example: “View transactions”, “Write off items from warehouse”).
- Save the role.
Step 3. Create a position and link the role
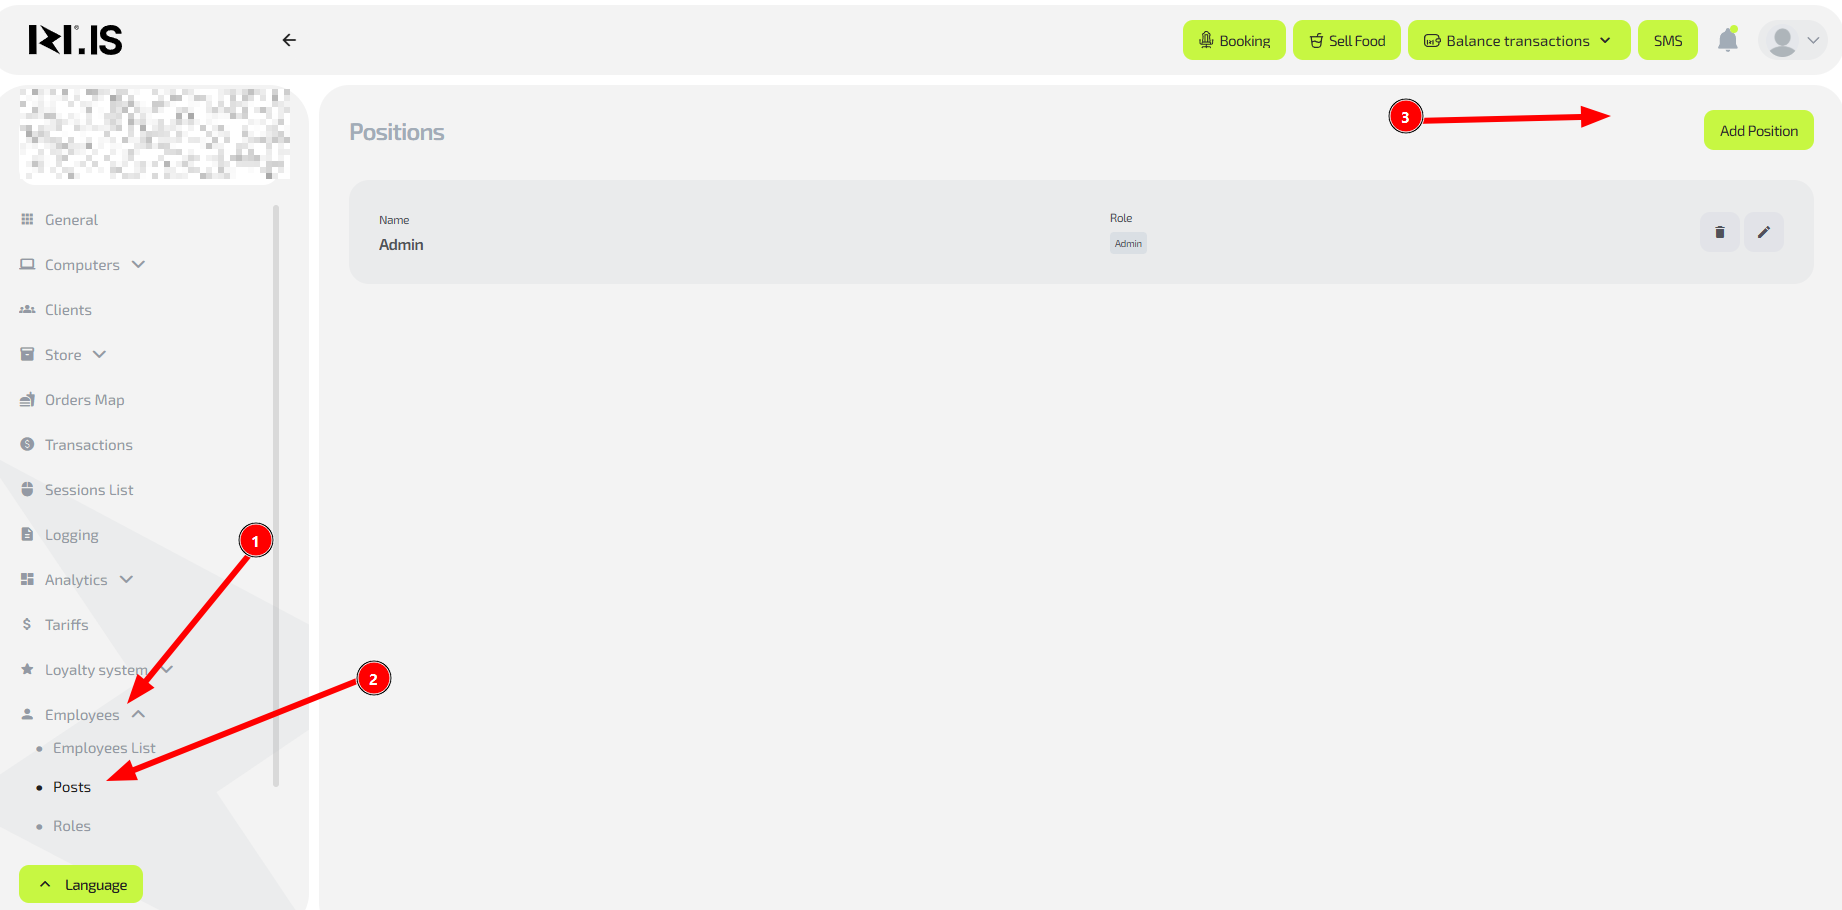
Why this is needed: A position is the “public” title for a staff member (for example, “Bartender” or “Senior administrator”) that is linked to a specific set of rights (a role).
- In the “Employees” section go to the “Positions” subsection.
- Click “Add position”.
- Enter the position name (for example, “Hall administrator”).
- In the dropdown list select the role you created in the previous step.
- Save the position.
Step 4. Assign a position to a staff member
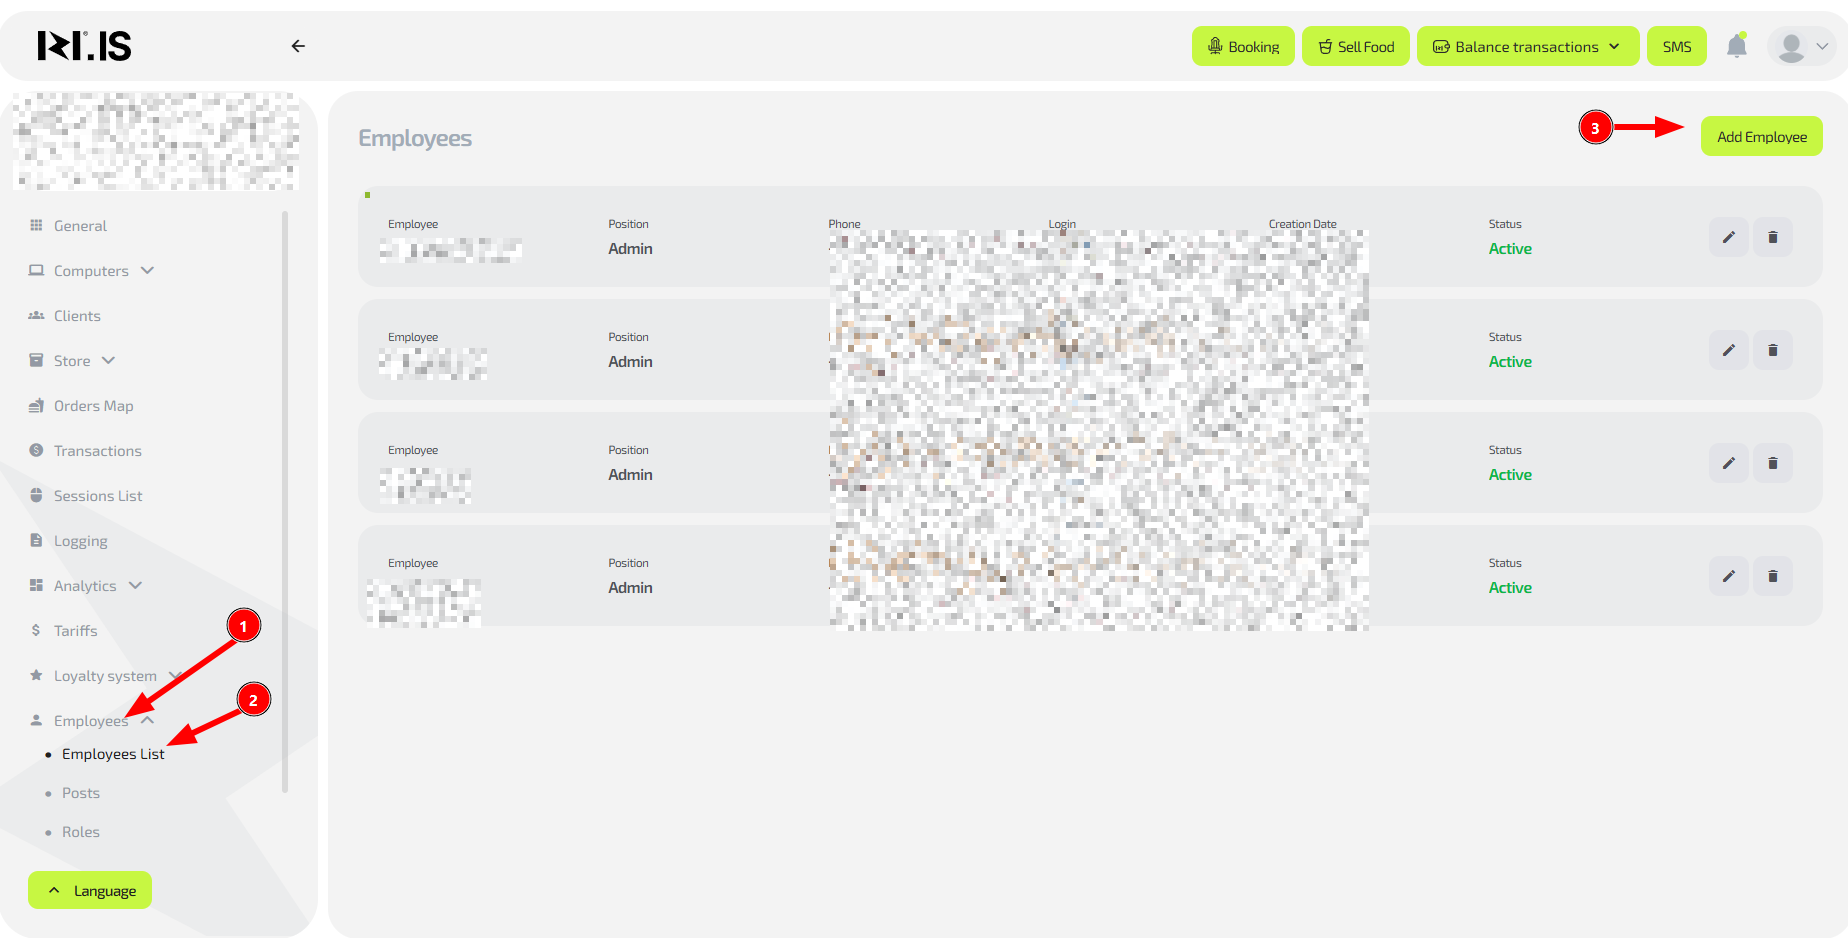
Why this is needed: This is the final step that gives the staff member all rights required for their work.
- In the general staff list find the required person.
- In the “Position” column click the edit icon.
- In the dropdown list select the position you created.
- Save the changes.
Done! Now the staff member can log into the system and will only see the sections allowed by their role.
Common situations
| Problem | What to do |
|---|---|
| The staff member registered but is not in the list | Make sure their phone number starts with +7. Numbers with +8 or 8 are not supported. |
| The staff member cannot access the required section | 1. Check which position is assigned to them. 2. Check which role is linked to this position and whether it has enough rights. |
| You need to give access to a new section to several staff members at once | Edit the role they use. Changes will be applied to all staff members with that position automatically. |
| The required section is missing in the roles list | Make sure your account has rights to manage roles. If the problem persists, contact technical support. |