Booking for future dates
Article goal
Learn how to book a computer in the club in advance via the IZI app to guarantee a seat at the desired time and avoid queues during peak hours.
Who this article is for
- Users who plan their club visits in advance
- Clients who want to secure a seat for a specific time
- Visitors who want to save time when coming to the club
What you will learn
- How to book a computer for a specific date and time
- How to choose a suitable tariff for booking
- How to pay for the booking via the app
- Why it is worth booking a seat in advance
Why book for future dates?
Pre-booking a computer allows you to:
- Guarantee yourself a seat — be sure that at the planned time a computer will be available for you
- Avoid queues — don’t waste time waiting during peak hours (evenings, weekends)
- Plan your time — organise your club visit without rush and uncertainty
- Choose the best place — book a specific computer in a convenient zone of the club
- Save money — some booking tariffs can be more profitable than per-minute payment
In short: booking removes the stress of “will there be a seat?” and makes your club visit comfortable and predictable.
Step-by-step guide
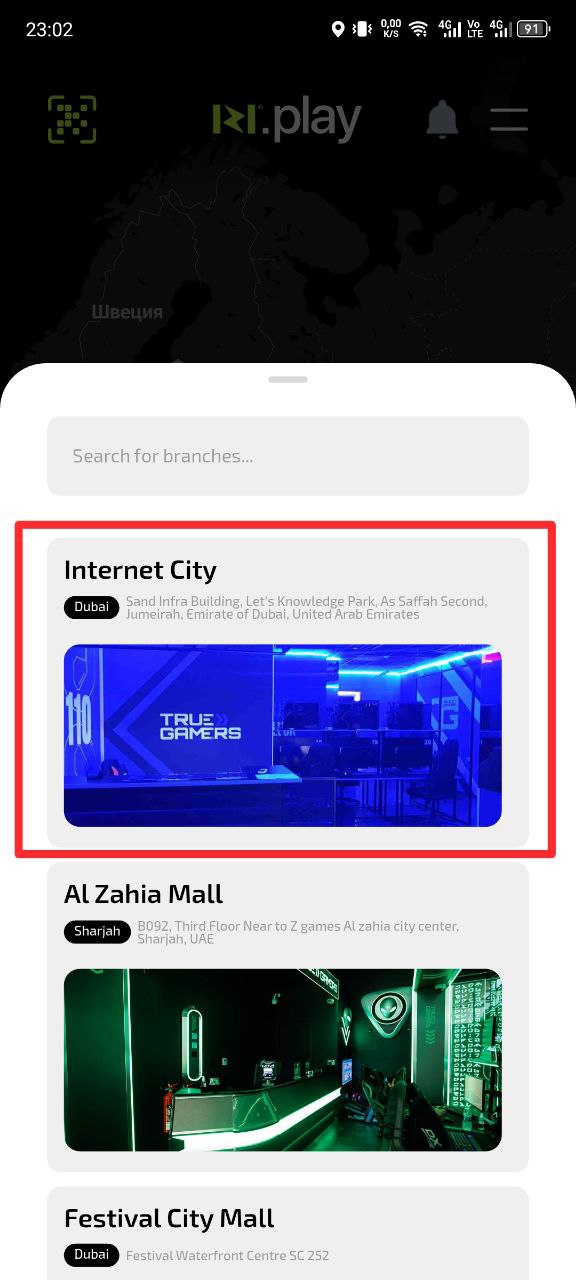
Step 1. Choose a club
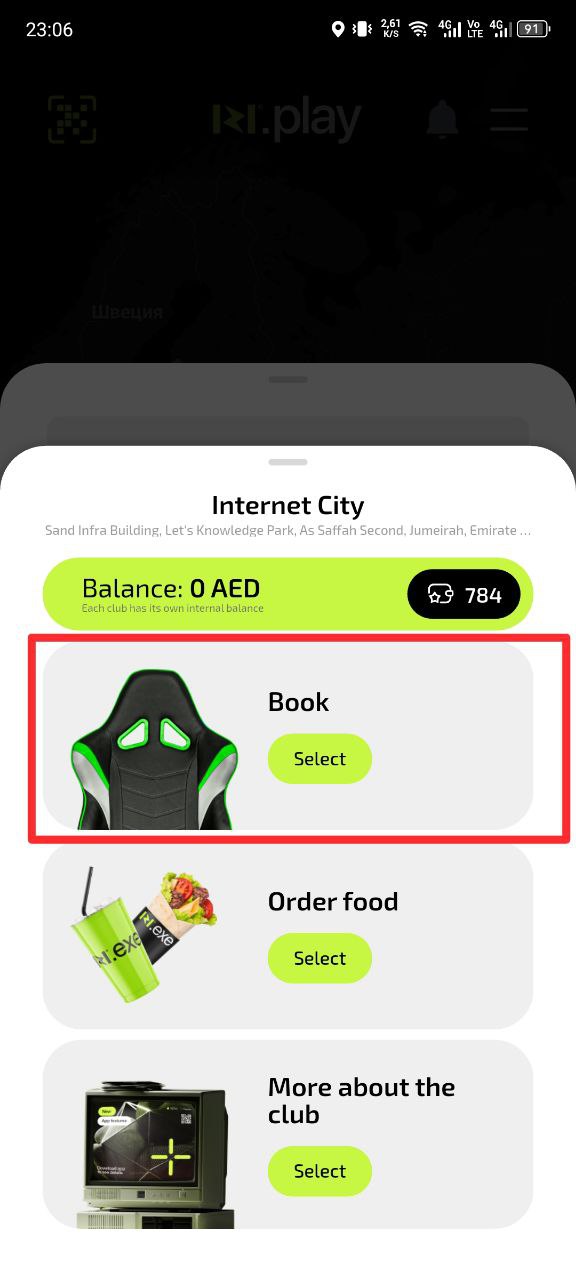
- Open the IZI app
- Select the required club from the list
- Make sure this is exactly the branch you plan to visit
Why this matters: Different clubs may have different equipment, tariffs and available computers for booking.
Step 2. Start booking
- On the club page tap the “Book” button
- The system will take you to the booking section
Why this matters: This is the only way to start the booking process for future dates.
Step 3. Select booking parameters
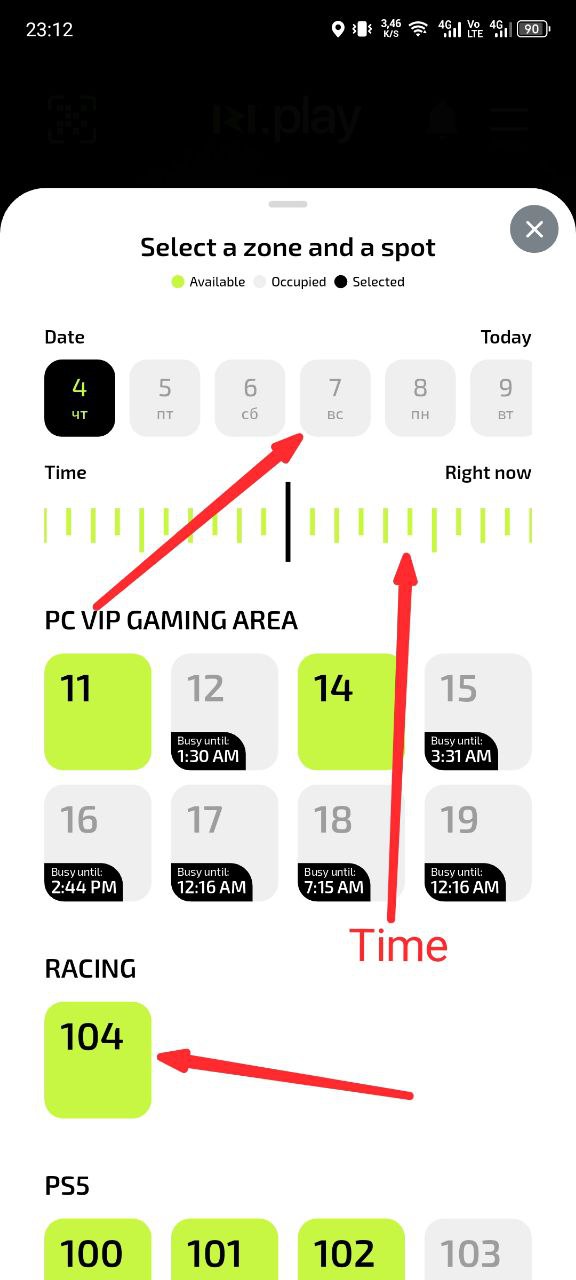
- Select a specific PC from the available ones
- Specify the date of your visit
- Set the session start time using the slider
- Tap “Next”
Why this matters: Specific parameters allow the system to find and reserve exactly the computer you want at the required time.
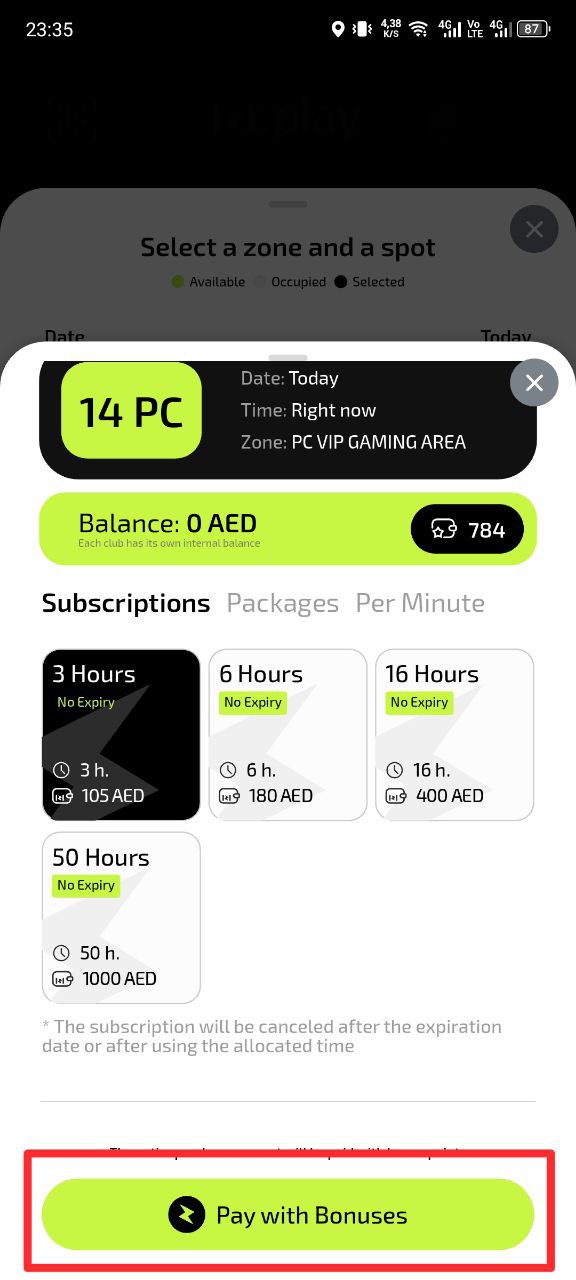
Step 4. Choose the payment type

- Choose one of the options: Season pass, Package or Per-minute
- Each option shows the price and conditions
Why this matters: Different payment types suit different situations — one-time visits or regular play.
Step 5. Select a tariff
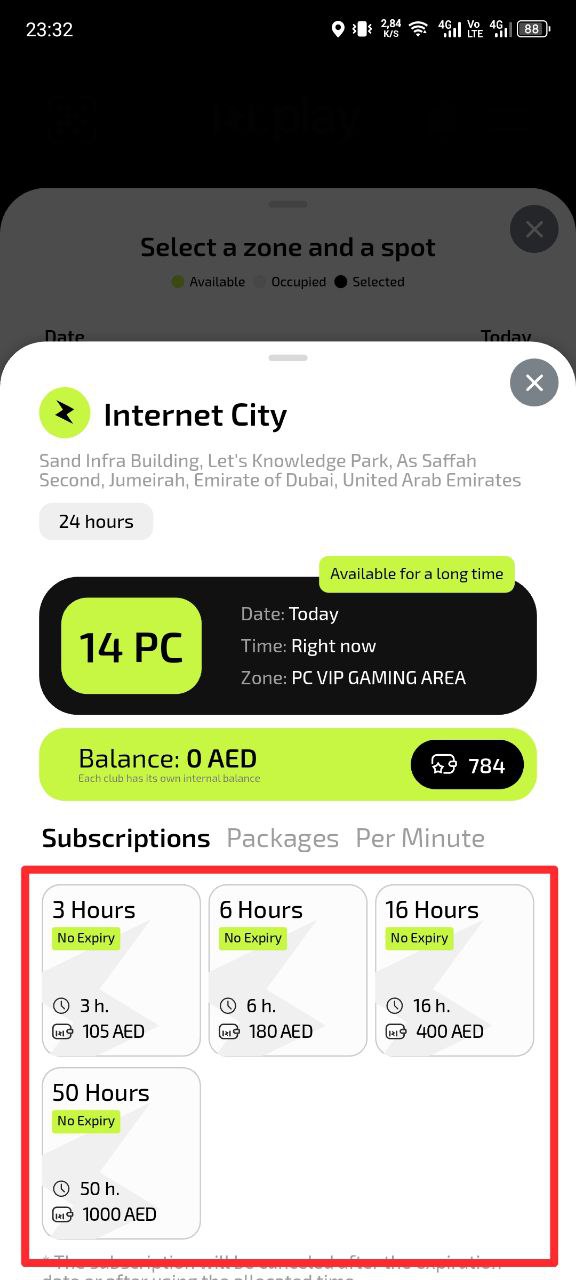
- From the list of available tariffs choose the suitable one
- Pay attention to the price and conditions of the tariff
Why this matters: Choosing the right tariff helps you save money and get the required amount of gaming time.
Step 6. Pay for the booking
- Check all booking parameters
- Tap the “Pay” button
- Confirm the payment with the selected method
Why this matters: The booking is confirmed only after successful payment. Until then, the seat is not reserved.
Common situations
| Problem | What to do and why |
|---|---|
| The required PC is not available for booking | What to do: Choose another computer or change the visit date/time. Why: Some computers may already be booked by other users or be unavailable for booking. |
| You cannot select a date | What to do: Make sure the date range is correct and that you are not trying to book a past date. Why: The system only allows booking for future dates within a defined range. |
| None of the tariffs is suitable | What to do: Check other payment types (Season pass, Package, Per-minute). There may be a suitable option in another section. Why: Different payment types offer different conditions and prices. |
| Payment does not go through | What to do: Check your card balance and internet connection. Try another payment method. Why: Without successful payment the booking is not confirmed by the system. |